LEGO minifigure collecting is a hobby that is quite popular. It takes up less space then collecting and displaying large LEGO sets.
Many people have found different solutions to keep their collection of minifigures. One of the best ways to display is to buy a purpose made display frame from some of the hobby shops. I’ve seen people use displays meant for golf balls to displays for toys.
But the problem is that it’s not readily available to everyone all over the world. And so there is a huge following of LEGO minifigure collectors who turn to using the Ikea Ribba Frame as the store can be found in almost every country and city in the world.
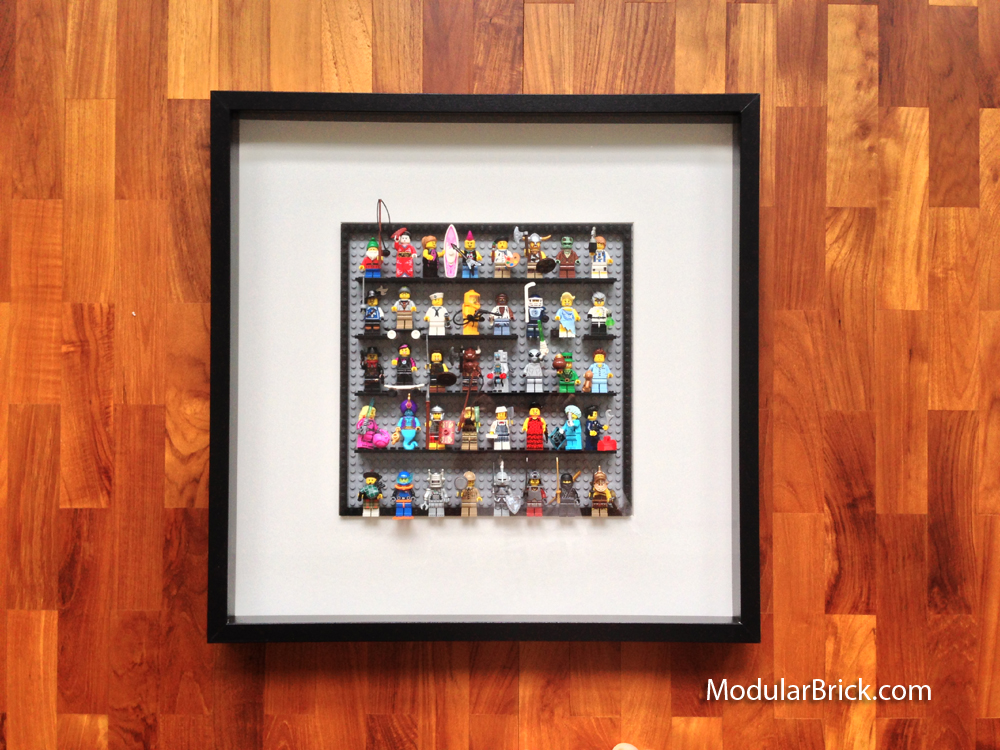
Here’s my version of it and instructions to make it.
Design Considerations
- Easy to obtain the materials and parts.
- No cutting, sawing or gluing.
Materials needed.
- Large Ikea Ribba Frame
- LEGO Building Plate 628
- Standard LEGO bricks
There are two sizes for the Ikea Ribba deep frames. I choose the large frame as I did not want to cut the LEGO gray base plate smaller.
The Ribba frame is larger than the LEGO gray base plate but the card board insert is smaller than the base plate. That’s where the standard LEGO bricks come in.
Leave the first six studs empty from the edge of all sides of the LEGO gray base plate and fix the LEGO bricks along the seventh stud. I used black colour 2 stud bricks bought from bricklink.com to form the entire square.
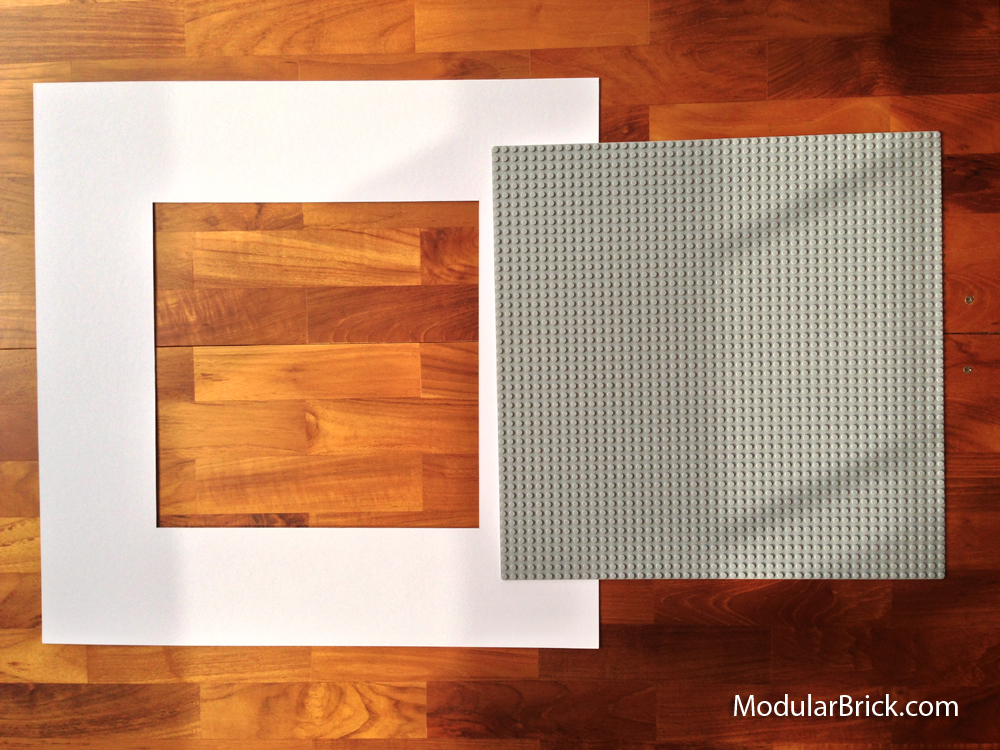
The square formed by the LEGO bricks will now fit within the card board insert nicely. It supports the base plate and also forms a nice inner border to accentuate the minifigures displayed inside.
By not cutting the card board, less minifigures can be displayed. But if you choose to cut the card board, you better have a very steady hand to create a nice clean cut. The original cut is actually at a 45 degree angle. Hard to achieve if done by hand.
With a LEGO gray base plate, you can now mount the minifigures in any way you want. One way is to use a standard two stud LEGO brick to hold the back of the minfigure legs to the gray base plate. If you have purchased the LEGO collectible minifigures series, they come with a base plate that you can slot in between the studs of the gray base plate.
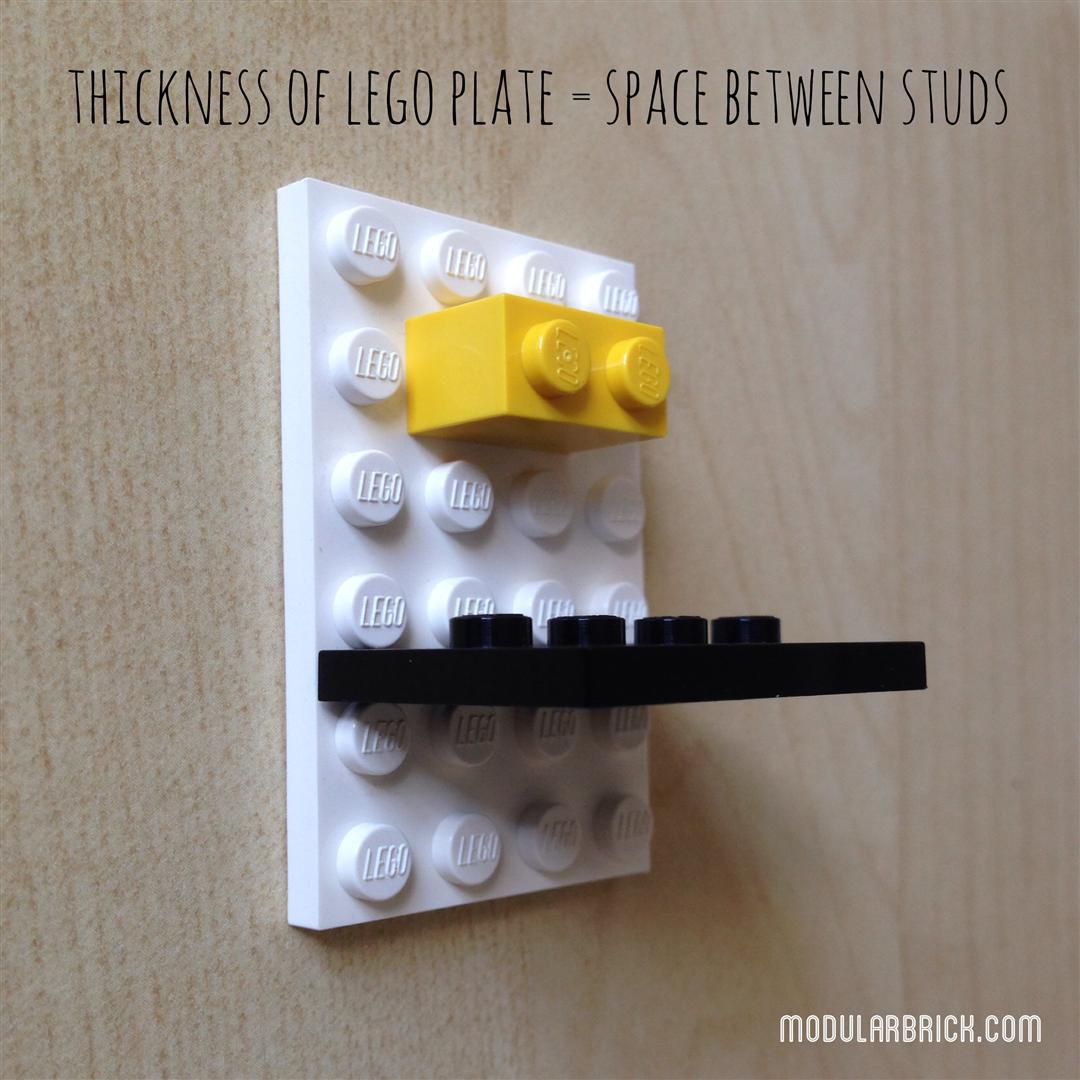
Here is a close up of how the base plate from the collectible minifigures series attach to the gray base plate. It will work for any other LEGO plate.
The thickness of the LEGO plate is the same as the space between the studs. Hence all you need to do is wedge the plate in between the studs to hold it perpendicular to the gray base plate.
All the minifigures can be placed in neat rows or randomly placed to create a scene. Perhaps you could have a fisherman minifigure on top with a diver minifigure below.
The best part of this design is that you can easily take apart everything and repurpose everything. No mess and no fuss.

Hi,
I’m looking at making this as a birthday present for my friend. I can’t quite see (or understand) what you’ve used to make the figurines stand up? Can you please help?
Thanks,
Rachael
Hi there,
I’ve update the post with a new image. The LEGO plate thickness = the space between the studs. All you need to do is wedge the plate between the studs and it will hold it perpendicular to the gray base plate. You can also use a normal brick to connect the gray base plate and hold the back of the legs of your minifigures.
Have fun making the display.
Cheers